Bigfoot Field Note #1– Part II
Posted by: Rick Noll on December 25th, 2005
Part II – Documenting Bigfoot Tracks
Misidentification –
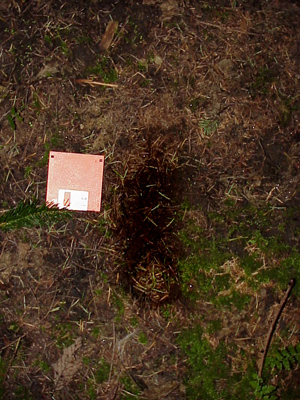
The two closest animals that make tracks similar enough to be included in misidentifying Bigfoot like tracks with what are not Bigfoot tracks come from bear and humans. There are a couple of other animals out there that can make sign that could indicate a Bigfoot like track when found in conjunction with other impressions, i.e. I found a human boot track with the front of the rounded boot right at the edge of both the front right and left hoof tracks of an elk. This gave the impression of a rather large barefooted-humanoid track sporting but four long toes. You can also find where weather has acted on soils and caused what look like track impressions with water runoff and of course the very deep impressions of moved rocks.
There doesn’t seem to be a track identification guide for us Bigfoot hunters. We have excellent books and classes on all the other various local wildlife, their tracks and of the sign they leave… we even have this for humans, developed for CSI* and SAR** purposes. We have absolutely nothing for hoaxing.
Hoaxing –
Track hoaxing seems to come in two types:
1. Original
2. Copy
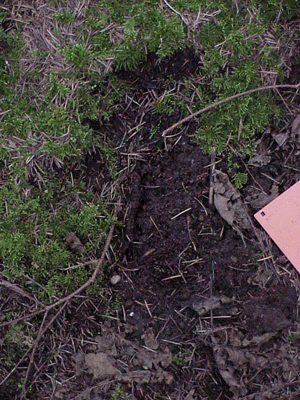
An original hoax are those that someone has made from scratch, maybe carved out a plug of wood, attached them to their own shoes and preceded to make Bigfoot tracks with them. Digging out a track in the ground would not be the most efficient method of faking a track, but it could be a way of making the original plug… just cast it afterwards. Originals can be very well put together and look quite real or they can look like ole’ grandma’s oatmeal cookies.
A copy is just that, a track or cast of a track that has existed for years, suddenly turns up slightly altered in maybe a different part of the country. Identifying surface details link the two casts with more than morphology of the foot.
The purpose of hoaxing a Bigfoot track can range from gaining publicity to that of perpetrating a practical joke on others. Who really knows exactly why people do it but it is a fact that they have. It’s important to understand the various reasons why people do this because they can then become tools in helping eliminate potential motives in future track finds by people. I have always encouraged people to develop such a list of reasons for themselves… keeping it secret… like a core competency in helping determine the validity of any Bigfoot evidence discovery. It should only be shared with the most trusted of companions.
Tracks are only a representation of what made them, in a substrate that will accept them. There will never be a perfect, exact replica of the object making a track because of the infinite amount of finer and finer detail contained within the original object. But if we look at the amount of resolution needed to basically identify what made a track we will find that most fine loose soils will suffice. It is only when we demand the finer details such as dermataglyphics, skin folds and creases or maybe even actual sweat pores that we find that the soil the impression was made in cannot hold such small details, or if they can, for any length of time and duress. Still though, the casting material used in capturing the male 3-D representation of the object through the impression should have the standard resolution of 1/3 that of the finest of the details wanting to be captured.
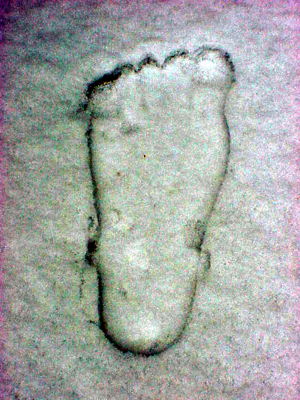
I identify Bigfoot tracks with the following basic attributes. I won’t be spelling out everything because it could give potential hoaxers even more ammunition to continue their trade.
1. Length – The length of a Bigfoot track is well outside of the norm for humans. The problem here is that for obvious reasons not all Bigfoot can have 18 inch long feet. There has to be some that are small enough to get out of the womb. But for those larger tracks, this is a dead giveaway that your not dealing with a human.
2. Barefoot – Of course the track is bare foot; no shoes. Some human tracks can appear to be shoeless. This is where tracking skills come in. Never be satisfied with only one track.
3. All parts of the track are from the same object, impressed at the same time. You might find something from three different animals that form an impression looking surprisingly like a Bigfoot track.
4. Heel to Ball Ratio – Greater than the human norm. Here we can get away from using just a length. A Bigfoot track appears to be significantly different from that of a human and bear. The width of the heel and ball is much closer in these giants.
5. Depth – Indicating greater weight then the human norm for the size of the foot. Even if a Bigfoot weighed in around the same as a bear, the bear distributes it’s weight on four legs, with only a quarter of the weight over each foot. A two legged animal supports it’s weight over two. How much does the actual size of the foot though counteract this depth (Grover’s Snowshoe effect).
6. Pressure ridges indicating weight rather then impact. If they are in the right spot for the bones, terrain and overall context it gives one pause.
7. 1-2-3-4-5 – Or other toe variations that do not include the norm for a bear. Bears do not have a large hallax, the toes are not in the shape of a symetrical lazy "C".
8. No arch – The foot is rather flat footed.
9. The edges of the track indicate a soft tissue mushrooming, undercutting the intersection of impression and substrate.
10. Context – The track is found in an area where a wild animal could roam freely, seeking shelter, food, water and mate with the least human influence; A down town Yakima track find would scream hoaxing but a couple of tracks found outside of Sunrise lodge on Mt. Rainier would gather every Bigfoot investigator from miles around.
11. Lack of tool marks. Look at the snow picture above. An fake of course. See where the hoaxers pried the flat shape back out of the snow to leave the impression?
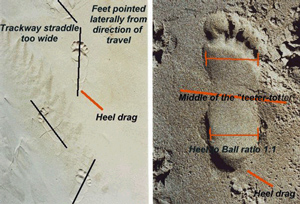
Without touching any track, you need to photograph or sketch the following:
1. Over all general terrain. Include good landscapes showing prominent wilderness distances and types, green ways, streams and potential concealed travel routes, etc.
2. In line with print trail, mark prints with flags so as to easily be seen in the photographs. Lay tracking stick on ground in line as well (it would be good if this stick had permanent 1” marks that were visible).
3. Close-up of signature print with ***scale. Capture any surface details.
4. Close-up of toes with scale.
5. Close-up of heel with scale.
6. Repeat documenting as in 3., 4. and 5. for the other two or more prints. It is imperative though for at least the tracks being casted be documented.
7. Map the prints. Show direction of travel, stride length and other details if available.
8. Place location of find on area map.
9. If you know how to make stereo pictures you might try your hand at it here.I prefer to use a 50mm to 90mm lens in photographing tracks and will also include some high aspect perspectives to catch the available light just right. The best flash for track pictures might just be a ring light. If you have a ring light you might try using it… but most flashes are best used off camera axis and with a reflector on the opposite side. You want some contrast in your pictures, showing different depths… but this is a two edge sword because you can also get distracting contrast on pine needles, sticks and rocks. Also remember that what your camera see’s and you see are two different things. The camera will try and take the average light in a scene and make it 18% gray. Gray snow is not pretty… the opposite is something underexposed and lacking in detail.
I don’t think you will really need a macro lens or supplemental diopters, but you can try them out. A tripod and cable release would help though. No cable release? Use your self timer.
Black and white (monochromatic) film is fine for track pictures and you can even experiment with some filtration (Red, yellow and green probably. A Polarizer or ND filters would add very little). Color can be kind of distracting in the pictures interpretation. Infrared film would do nothing for the images but if the subject that just left the impression were but minutes ahead of you, a thermal camera would produce some interesting images.
B&W costs more then color. Color slide (positive) film has less exposure latitude and so is prone to more amateur use errors… stick with color print film and you should come back with the pictures. My film speed choices would depend on the available light but I would definitely stay away from the really grainy types (400+).
Using digital is getting to be more common place and with the ability to check the images before proceeding to do anything else is a great incentive to go this route. Way back when there was no digital I would use Polaroids first.
The last thing I would recommend is that although the image needs to be scientifically accurate, it would be nice if it were visually pleasing as well. I know art is in the eye of the beholder… I just think that great images have more impact no matter their subject content.
_______________________________________
*CSI stands for Crime Scene Investigation.
**SAR stands for Search and Rescue.
*** scale, I have tried out many different types and prefer a metal tape measure with a 1/2" to 3/4" width, your pictures will show it a lot better if you can slightly rotate the tape so it isn’t reflecting the light coming from directly behind you, back into the camera.
About Rick Noll
Rick Noll has been actively searching for the Sasquatch since 1969 and continues his pursuit with extended field trips into the Pacific Northwest's most remote regions. Rick has worked with Peter Byrne, René Dahinden, Grover Krantz, John Green, Jeff Meldrum and the BFRO during all this. He helped with many documentaries on the subject including Animal X: The Skookum Expedition and Sasquatch: Legend Meets Science.




Excellent – thank you so much for this information.
Have you ever had a track you were unsure of until you actually cast it? Just curious.
I have seen bear tracks that, when the front and back foot overlap, look EXACTLY like the photos I’ve seen of bigfoot tracks.
Yes I can not always tell just what a track is… casting it can give that much more info. I have found impressions that have gone both ways… turning out to be human and what I believe to be Bigfoot.
When in doubt, if you can… Cast it.
A very interesting and informative piece, and I especially like it because it highlights the importance of careful casting. Cast making is an inherently difficult and time-consuming process, and a botched cast is almost worse than no cast, because it can throw in so many artifacts and red herrings. (Of course, it’s fair to point out that even the best casts are of limited evidentiary value.)
I’d like to see more research done on the ways in which known animals can create Bigfoot-like tracks. As Reyko pointed out above, “I have seen bear tracks that, when the front and back foot overlap, look EXACTLY like the photos I’ve seen of bigfoot tracks.” One method might be to do research in a zoo or other open area where bears are known to roam but Bigfoot (presumably) do not. It would not be definitive (nothing in Bigfoot research is), but if known bear tracks can mimic suspected Bigfoot tracks, that will help avoid misidentifications. Plus, such a controlled experiment would give some scientific legitimacy to the field.
All are good points. There are a lot of things in the woods that can look like the track of a live animal, i.e. water drainage, moved rocks or logs, limbs of trees that have fallen, even tire tracks. Faking tracks is quite different than misidentification. Faking is malicious… misidentification is ignorance or lack of experience.